
Quick Answer:
In most Acworth homes, the best time to deep clean new floors is approximately 24 to 72 hours after all construction, punch-list work, painting, caulking, and contractor traffic have completely ended. The deciding factor is not simply how many days have passed, but whether the home has stopped producing and circulating fine construction dust that could quickly recontaminate or scratch—the newly cleaned flooring.
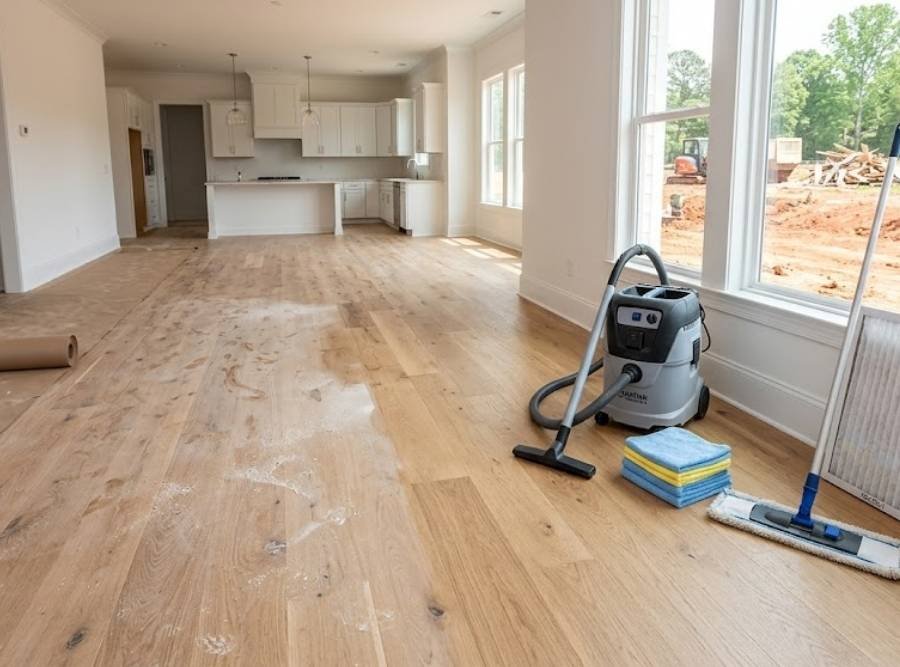
Homeowners naturally want their new floors professionally cleaned as soon as construction ends. The house may have reached its closing date, the builder may have completed a general cleanup, and furniture delivery may already be scheduled. Yet when afternoon sunlight stretches across the rooms, the hardwood appears hazy, the tile looks cloudy, and a fine white powder remains visible along baseboards, floor transitions, and corners. Many homeowners begin wondering whether they should clean immediately or wait for the dust to settle.
The best answer is not based on an arbitrary number of days. A home is ready for a true post-construction floor cleaning only after it has stopped actively creating new contamination. If painters are still completing touch-ups, carpenters are adjusting trim, electricians are cutting drywall, or contractors are walking through the home in work boots, the floor is not ready for its final deep cleaning. Cleaning during that stage often produces a beautiful result for a few hours, only for another layer of dust to settle across the surface the following morning.
We see this situation in new homes and remodeled properties throughout Acworth, including newer communities near Baker Road, Mars Hill Road, Bentwater, Centennial Lakes, and the Lake Allatoona area. The home appears complete from a distance, but several trades may still be returning to finish minor details before closing. Each visit can introduce more drywall powder, sawdust, caulk residue, paint particles, outdoor soil, and abrasive grit. Until that activity ends, the house is still functioning like a construction site even if the major work has been completed.
That is why we recommend scheduling professional floor cleaning around project completion rather than occupancy alone. A family may be moving in on Friday, but if contractors are still finishing work on Thursday afternoon, cleaning several days earlier is too soon. The safest sequence is to complete all trade work, remove protective floor coverings, replace or clean the HVAC filter, allow remaining airborne dust to settle, and then perform the final floor cleaning before normal household traffic begins.
Builder Cleanup and Professional Floor Cleaning Are Not the Same Service
Many homeowners assume the builder’s final cleanup means every surface has been thoroughly cleaned and is ready for occupancy. Builder cleanup is important, but its primary purpose is usually to remove visible construction debris, packaging, scraps, loose dust, and materials left behind by the trades. It helps the home pass a final walkthrough and creates a more presentable environment for closing. It does not always remove the fine particulate contamination embedded in floor texture, grout joints, corners, and protective finishes.
Construction dust behaves differently from ordinary household dirt. Drywall sanding creates extremely fine powder that can remain suspended in the air, settle into small gaps, and reappear after repeated cleaning. Tile installation may leave grout haze or mineral residue across the surface. Paint, adhesive, and caulk can create small bonded spots that ordinary sweeping will not remove. Even when the floor looks clean from standing height, a closer inspection in natural light often reveals a dull film or fine grit underfoot.
Professional post-construction floor cleaning focuses on removing those remaining contaminants without damaging the new flooring. The process begins with dry soil extraction because introducing water before the loose dust is removed can make the problem considerably worse. The cleaning method must also match the material, whether the home has factory-finished hardwood, site-finished wood, engineered flooring, luxury vinyl plank, ceramic tile, porcelain tile, or natural stone. A method that is appropriate for durable tile may be too aggressive for a new wood finish or thin engineered wear layer.
The difference becomes especially important in larger custom homes where multiple trades have worked over several months. A basic cleanup may remove the obvious mess while leaving microscopic dust throughout the house. That dust can migrate from window sills, wall ledges, cabinets, vents, and baseboards back onto the floor after the first cleaning. A professional final clean therefore works best when the entire project has reached true completion and the surrounding surfaces are no longer releasing new debris.
Why New Floors Are Vulnerable to Construction Dust
New flooring is often described as durable, but durable does not mean immune to abrasion. The protective finish on hardwood, the factory coating on engineered wood, the wear layer on luxury vinyl, and the glaze on tile are all designed to withstand normal household use. They are not designed to have sharp construction particles continuously ground across them by contractors, moving crews, furniture dollies, pets, or new occupants.
Drywall dust, sawdust, tile debris, and fine mineral particles can act like microscopic abrasives. One particle may not cause visible damage, but thousands of particles trapped beneath shoes or furniture pads can create fine scratches as people move through the room. These scratches are often difficult to notice individually. Instead, homeowners see a general loss of clarity, dull traffic paths, or swirl marks that become most visible when sunlight reflects across the floor.
The risk is greatest around entrances, hallways, kitchens, and other areas where traffic becomes concentrated. A moving crew rolling furniture across dusty hardwood can press abrasive grit against the finish with considerable force. Protective pads may reduce impact damage, but if dust is trapped beneath them, the pads can still drag contamination across the surface. By the time the room is furnished, a brand-new floor may already show scratches that cannot be removed through cleaning alone.
This is one reason we advise homeowners not to treat post-construction cleaning as a purely cosmetic step. Removing construction dust early helps preserve the protective surface before ordinary household life begins. The goal is not merely to make the house feel cleaner for move-in day. It is to prevent construction residue from becoming the first source of long-term wear on flooring that may have cost thousands of dollars to install.
Why Mopping Too Soon Can Make Construction Dust Harder to Remove
One of the most common post-construction cleaning mistakes is wet mopping before the loose dust has been thoroughly extracted. Homeowners see white powder across the floor and understandably assume that water will capture it more effectively than sweeping. In reality, mixing fine drywall dust with water can create a thin paste that spreads across the surface rather than lifting cleanly away. As the water evaporates, the floor may be left with streaks, haze, or residue that appears again in direct sunlight.
This effect is especially noticeable on dark hardwood, smooth porcelain tile, and glossy luxury vinyl. The floor may look acceptable while it is damp, but once it dries, a cloudy film becomes visible across the room. Repeated mopping can spread the residue into a larger area, particularly when the same mop water is used for multiple rooms. What began as removable loose dust becomes a more difficult surface-contamination problem.
Too much water also introduces unnecessary risk to wood-based flooring. Moisture can move into seams, expansion gaps, unfinished edges, and small surface imperfections. A single lightly damp cleaning may not cause obvious harm, but flood-mopping, steam cleaning, or repeatedly soaking new hardwood can create swelling, edge movement, finish problems, or moisture-related haze. These risks are especially concerning when the flooring manufacturer has strict maintenance requirements that could affect warranty coverage.
The safer process is to remove dry particulate matter before applying any cleaning solution. Professional HEPA-filtered extraction captures fine dust rather than simply redistributing it through the room. Once the loose contamination has been removed, the flooring can be cleaned with an appropriate product and controlled amount of moisture. This sequence protects the finish and produces a cleaner result than repeatedly pushing wet construction residue across the floor.
Why the White Dust Keeps Coming Back After You Clean
A homeowner may sweep, vacuum, and mop the entire house only to find another layer of white dust the following day. This can make it seem as though the floor was never cleaned properly. In many cases, the floor is not the original source of the recurring dust. The remaining contamination is settling from walls, vents, trim, cabinets, window ledges, light fixtures, and other horizontal surfaces that were not fully addressed during the initial cleanup.
The HVAC system can also continue redistributing fine construction particles after the trades have left. Drywall sanding, cutting, drilling, and general construction activity release particles into the air that may be pulled into return vents and circulated throughout the home. If the air filter remains dirty after construction, the system may continue releasing some of that contamination into occupied spaces. The homeowner cleans the floor, runs the heating or cooling system, and then notices another film developing across the rooms.
Acworth’s climate can make the dust more noticeable. During humid weather, fine particles may cling to flooring, trim, and other surfaces rather than remaining loose and easy to remove. Spring pollen can enter through doors and open windows, mixing with construction dust and creating another layer of yellow or gray residue. Rainy move-in days introduce red Georgia clay and damp footprints, adding ordinary outdoor soil to a home that has not yet been fully cleared of construction contamination.
This is why the final floor cleaning should generally occur after high surfaces have been dusted and the HVAC filter has been changed. Cleaning from the top of the room downward prevents newly disturbed particles from falling onto a finished floor. It also reduces the likelihood that homeowners will need to repeat the entire process several days later because the rest of the house continued releasing dust.
How to Tell When the Home Is Truly Ready for Deep Cleaning
The home is usually ready for professional floor cleaning once all sanding, cutting, drilling, painting, caulking, trim work, and punch-list repairs have ended. No contractors should be returning to create additional dust or track construction soil through the rooms. Protective coverings should be removed carefully, and any adhesive or taped edges should be evaluated before they harden further or leave residue on the finish.
The HVAC system should also be considered part of the cleaning sequence. After construction ends, replacing the filter and allowing the system to operate can help capture particles that remain airborne. The exact settling period varies, but waiting approximately 24 to 72 hours after the final trade work often gives remaining dust time to circulate and settle. A highly contained project may require less time, while a large custom build or dusty renovation may require more than one cleaning phase.
Homeowners can also look for practical signs that the house is ready. If fresh dust no longer appears on window sills and countertops overnight, the vacuum is no longer filling rapidly with white powder, and contractor traffic has stopped, a final deep cleaning is likely to hold much better. If the floor becomes gritty again only hours after vacuuming, the home is still releasing contamination from somewhere else.
The timing may need to be adjusted around furniture delivery. Ideally, the primary post-construction cleaning should happen before heavy furniture enters the home so the entire floor remains accessible. A lighter maintenance cleaning may then be useful after movers finish, particularly if they tracked in soil or moved large items across entryways. This two-stage approach is often more effective than waiting until every room is furnished and discovering that dust remains trapped beneath beds, sofas, cabinets, and area rugs.
The Best General Timing for New Construction Floors
For most new homes in Acworth, a professional floor cleaning performed 24 to 72 hours after the last contractor finishes provides a sensible starting point. This window allows remaining airborne particles to settle while avoiding weeks of foot traffic that could grind construction grit into the finish. It also gives homeowners enough time to replace the HVAC filter, inspect the floor in natural light, and identify any paint, grout haze, adhesive, or caulk residue that may require specialized attention.
The recommendation changes when construction is still occurring in phases. A whole-home renovation may require an initial cleaning after the dustiest work, another after finish trades are complete, and a final floor cleaning before full occupancy. Trying to protect the home with only one cleaning while the project is still active usually leads to frustration because each returning contractor creates another layer of contamination.
The type of flooring also matters. Freshly site-finished hardwood may require a specific curing period before any wet cleaning, depending on the finish system and installer’s instructions. Factory-finished hardwood and luxury vinyl can often be cleaned sooner, but they still require material-safe methods. Tile and grout may be physically durable, yet grout haze, adhesive residue, and new sealers can create their own timing and product restrictions.
The most important rule is to follow the flooring installer’s and manufacturer’s care instructions whenever a newly applied coating, finish, sealer, or adhesive is involved. Construction completion and finish curing are not always the same thing. A house may be free of dust while a coating still requires additional time before it can safely tolerate cleaning. Professional cleaners should account for both conditions before beginning.
Material-Specific Cleaning Matters After Construction
Post-construction cleaning should never treat every floor the same way. Hardwood, engineered wood, luxury vinyl plank, ceramic tile, porcelain tile, grout, and natural stone all react differently to moisture, abrasion, and cleaning chemistry. A method that safely removes residue from tile may dull a hardwood finish, while a product designed for wood may leave film behind on textured vinyl or stone.
New hardwood flooring requires especially careful handling because the surface people see is usually a protective finish rather than exposed wood. Drywall dust and fine grit must be removed without grinding those particles into the coating. Once the dry soil has been extracted, the floor should be cleaned with a finish-compatible, neutral-pH solution and a controlled amount of moisture. Steam mops, aggressive scrub pads, and excessive water can introduce unnecessary risk, particularly around seams, expansion gaps, and unfinished edges.
Engineered hardwood often looks similar to solid hardwood, but its construction creates additional limitations. The upper wood layer may be relatively thin, which means scratches and finish damage cannot always be sanded out repeatedly in the future. Protecting that factory-applied surface from abrasive construction debris is therefore especially important. A brand-new engineered floor that becomes scratched during move-in may have fewer restoration options than homeowners expect.
Luxury vinyl plank is durable and moisture-resistant, but it is not invulnerable. Construction grit can scuff the wear layer, while paint, adhesive, and caulk residue may require more than ordinary mopping. Strong solvents or abrasive cleaning pads can permanently alter the appearance of the surface. The safest approach is to identify the residue first and use the least aggressive method capable of removing it.
Tile floors create a different set of concerns because the tile itself may be easy to clean while the grout remains highly vulnerable. Drywall dust and fine construction particles settle into porous grout joints, causing new grout to look uneven or chalky. Grout haze can also remain on the tile surface after installation, creating a cloudy appearance that homeowners sometimes mistake for permanent damage. Removing these residues early is usually easier than waiting until ordinary soil, cleaning products, and foot traffic become mixed into them.
Natural stone requires another level of caution because acidic cleaners, harsh alkaline products, and abrasive tools can etch or dull certain materials. Even products commonly recommended for household cleaning may be inappropriate for marble, travertine, limestone, or other sensitive stone surfaces. Post-construction cleaning should begin with correct material identification rather than assumptions based on appearance alone.
Why Grout Haze Should Not Be Ignored
Grout haze is one of the most common reasons new tile looks dull after construction. It develops when a thin layer of grout residue dries across the tile surface during installation. Under ordinary room lighting, the tile may appear acceptable, but direct sunlight or bright overhead lighting reveals a pale, cloudy film that keeps the new floor from looking finished.
Fresh grout haze is generally easier to address than residue that has remained in place for weeks or months. As it cures, it can become more strongly bonded to the tile and may require increasingly specialized removal methods. The correct approach depends on the type of tile, the grout formulation, whether a sealer has been applied, and how long the residue has been present. Aggressive scrubbing without considering those factors can scratch glossy tile or damage sensitive stone.
Homeowners sometimes repeatedly mop the floor, assuming the haze is loose dust. Water alone often does little to remove cured grout residue and may leave additional streaking behind. Strong acids are also risky because they can damage grout joints, metal transitions, natural stone, and nearby finishes. What appears to be a simple cleaning issue may require controlled chemistry and careful agitation to remove the residue without affecting the new installation.
It is also important to distinguish grout haze from construction dust settled inside the grout joints. The two problems may occur at the same time but require different treatment. Haze affects the tile face, while embedded dust changes the appearance of the grout itself. A professional inspection can determine whether the floor needs surface residue removal, deeper grout cleaning, or both.
Common DIY Mistakes That Damage New Floors
The desire to clean quickly is understandable, especially when closing, furniture delivery, or move-in day is approaching. Unfortunately, urgency often leads homeowners to use stronger chemicals, more water, or more aggressive scrubbing than the new flooring can safely tolerate. These choices may make the floor look cleaner temporarily while creating permanent finish changes that become more noticeable later.
Steam cleaning is one of the most common concerns on wood-based flooring. Steam can push heat and moisture into joints, seams, and vulnerable edges. Although the surface may dry quickly, moisture can remain beneath the visible layer and contribute to swelling, cupping, edge movement, or adhesive problems. Manufacturers frequently restrict or prohibit steam use, so using it on a new floor may also create warranty concerns.
Vinegar is another popular recommendation that does not belong on every surface. Its acidity may gradually dull certain finishes and can damage natural stone. Bleach, ammonia, abrasive powders, and strong degreasers carry similar risks when used without understanding the flooring material and the residue being treated. Construction cleaning should not become a chemistry experiment on a brand-new investment.
Magic Erasers and abrasive scrub pads can also create problems. Their texture may remove paint marks or stubborn residue, but it can also change the sheen of hardwood, vinyl, laminate, or glossy tile. The cleaned spot may appear duller than the surrounding floor once light reflects across it. Spot testing in an inconspicuous area is essential, but even that does not replace using a product and method approved for the material.
Another mistake is applying polish or wax to make a cloudy floor look shinier. Many modern factory-finished floors are not designed to receive traditional wax. Adding an incompatible coating may trap construction residue, create uneven gloss, attract dirt, and complicate future cleaning or refinishing. The goal after construction should be to reveal the original factory or applied finish, not cover it with another product.
Why One Cleaning May Not Be Enough
In an ideal project, all construction ends, the home is cleaned from top to bottom, and the floors remain clean. Real projects are rarely that simple. A painter may return for a final touch-up, a cabinet installer may adjust doors, an electrician may cut into drywall, or a builder may complete warranty corrections after closing. Each return visit has the potential to produce more dust and abrasive debris.
Larger custom homes around Lake Allatoona, Governors Towne Club, Brookstone, and newer areas near Mars Hill Road may involve many specialized trades. Even when the general construction is complete, final adjustments can continue over several days. Scheduling the primary deep cleaning after punch-list completion reduces repeat work, but a lighter follow-up cleaning may still be worthwhile after furniture delivery or final contractor visits.
Phased renovations often need more than one professional cleaning by design. An initial extraction may be used after demolition and sanding to control widespread dust. Another cleaning may follow painting, trim work, and flooring installation. The final service then removes the last layer of residue before the renovated space returns to normal use.
This does not mean homeowners should pay for repeated full-scale deep cleaning unnecessarily. It means the cleaning plan should match the construction sequence. Removing heavy dust at strategic stages prevents contamination from being tracked into clean areas, while reserving the detailed floor cleaning for the end protects the final result. A carefully timed two-stage process often costs less than trying to restore scratches and bonded residue after move-in.
Furniture Delivery Should Be Part of the Plan
Furniture delivery creates one of the greatest risks to freshly installed flooring. Dollies, moving blankets, cardboard, work shoes, and furniture legs can all carry grit into the home. Even experienced movers may unknowingly roll heavy items across particles left behind from construction, pressing that debris into the finish with substantial weight.
Whenever possible, the main post-construction cleaning should occur before large furniture enters the home. This allows complete access to the floor, including corners, closets, wall edges, and areas that will soon be covered by beds, sofas, cabinets, and rugs. It also provides an opportunity to identify damage or residue before those areas become difficult to inspect.
After cleaning, entrance protection should be used during the move without creating another problem. Clean, non-slip floor protection is safer than placing dirty cardboard directly on finished surfaces. Furniture legs should be equipped with appropriate clean pads, and heavy pieces should be lifted rather than dragged. Protective materials should also be removed promptly if there is any chance of moisture becoming trapped beneath them.
A light final cleaning after the movers leave is often sensible, especially around entryways and major traffic paths. This does not usually require repeating the entire post-construction process. Instead, it removes the outdoor dirt, cardboard dust, and incidental debris introduced during the move so the home begins occupancy in a genuinely clean condition.
Indoor Air Quality Is Part of Post-Construction Cleaning
Construction dust is not only a floor-maintenance issue. Fine particles can remain suspended in the air, settle on furnishings, and circulate through the HVAC system. For people with asthma, allergies, or other respiratory sensitivities, moving into a home that still contains significant construction dust may cause discomfort even when the rooms appear visually clean.
Some construction activities can generate silica-containing dust, particularly when concrete, mortar, stone, tile, or certain masonry products are cut or ground. Homeowners should not attempt to manage heavy airborne construction contamination without proper equipment and controls. The goal of final cleaning is not to create more airborne dust by aggressively sweeping or using an unfiltered vacuum.
HEPA-filtered extraction helps capture fine particles instead of exhausting them back into the room. Cleaning should also follow a top-down sequence so dust removed from ledges, trim, cabinets, vents, and other surfaces does not fall onto floors that have already been completed. HVAC filters should be replaced after dusty construction activity, and additional system evaluation may be appropriate when poor containment allowed substantial dust to enter the ductwork.
Opening windows may seem like a simple way to air out a new home, but in Acworth it can introduce spring pollen, humid air, or outdoor dust. Ventilation decisions should account for weather conditions and the type of contamination present. During humid periods, controlled filtration and dehumidification may be more helpful than bringing additional moisture into a home with new wood floors, coatings, adhesives, and grout.
When You Should Call a Professional Instead of Cleaning Again
A floor that remains slightly dusty after one household cleaning does not automatically require professional restoration. Continued white residue, visible scratches, stubborn grout haze, paint overspray, adhesive spots, or recurring cloudiness deserve closer evaluation. Repeatedly applying different products may make diagnosis harder and increase the chance of permanent surface damage.
Professional help is particularly valuable when homeowners do not know what type of finish or flooring material was installed. A product marketed as safe for hardwood may still be inappropriate for a specific coating, and a method that works on ceramic tile may damage natural stone. Identifying the material and residue allows the cleaning process to be selected deliberately rather than through trial and error.
It is also wise to stop and seek guidance when a new floor begins showing swelling, cupping, edge separation, peeling finish, or unusual discoloration. Those symptoms may involve moisture, installation conditions, adhesive failure, or coating problems rather than simple construction dust. Cleaning cannot correct an underlying installation or moisture issue, and introducing more liquid may worsen it.
Homeowners should also document visible damage before closing or before the final contractor leaves. If scratches, gouges, paint damage, or finish defects were caused during construction, photographs and written records may help distinguish those problems from ordinary post-move wear. Professional cleaning can reveal the floor’s true condition, but it cannot reverse every form of physical damage.
Protecting the Floor After the Final Cleaning
Once construction residue has been removed, the first several weeks of normal occupancy are an important transition period. New residents, furniture deliveries, unpacking, service technicians, and remaining warranty work can introduce another wave of soil. Frequent dry soil removal during this period prevents grit from accumulating while the household settles into its routine.
Clean entry mats should be placed at exterior doors, particularly during rainy weather when red Georgia clay can be tracked inside. Shoes worn around unfinished landscaping, driveways, and construction areas should be removed before entering. This is especially important in new subdivisions where surrounding lots may still be under construction and airborne dust remains higher than it will be after the neighborhood is complete.
Vacuuming or dust mopping should be performed with equipment that will not scratch the floor. Brush rolls designed for carpet may scatter debris or trap grit against hard surfaces, while damaged vacuum wheels can leave marks. Mop heads and microfiber pads should be clean because reusing contaminated tools can redistribute construction residue across rooms that were already cleaned.
Manufacturer-approved cleaning products should remain the default for ongoing care. More product does not usually create a cleaner floor and may instead leave a sticky residue that attracts soil. A light, controlled maintenance routine protects the original finish more effectively than frequent aggressive cleaning.
The Right Time Is After the House Stops Producing Dust
For most Acworth new construction and remodeling projects, the best time to deep clean the floors is about 24 to 72 hours after all dusty work and punch-list activity have ended. This gives suspended particles time to settle while preventing contractors, movers, and occupants from grinding the remaining grit into the new finish. The timeline should be extended whenever trades are still returning or shortened only when the project was tightly contained and the installer has confirmed that the flooring is ready.
The home should be dusted from high surfaces downward, the HVAC filter should be replaced, and dry particulate matter should be extracted before any wet cleaning begins. Fresh site-applied finishes, sealers, coatings, grout, and adhesives may require their own curing periods, so installer and manufacturer guidance must always take priority over a general timetable. A floor can be ready from a dust-control standpoint while still being too new for a particular cleaning process.
At Restore N Refresh, we look beyond whether the floor appears dirty. We evaluate the flooring material, finish, construction residue, dust migration, and condition of the surface before selecting a cleaning method. That approach helps remove the contamination that builder cleanup may leave behind without exposing new floors to unnecessary moisture, abrasion, or harsh chemistry.
If the floors in your new or recently renovated Acworth home feel gritty, look cloudy in sunlight, or continue collecting white dust after repeated cleaning, Restore N Refresh can help determine whether the home is ready for its final deep cleaning. Proper timing and finish-safe cleaning can preserve the appearance of new hardwood, engineered wood, luxury vinyl, tile, and grout before construction residue has a chance to create permanent wear.
